Dapple Design Shop will be CLOSED FOR CHRISTMAS from December 10, 2016 to January 4, 2017.
Showing posts with label sewing. Show all posts

Thursday, 26 March 2015

Burlap Birdies

These adorable little birdies are the result of an bad bout of boredom and an overfull scrap box.  They're bright and cheerful in a simple way.  They make me smile.


I'm repainting a small wooden frame to catch the blue one in.  Something fresh to hang in my new house.

Given the popularity of my Simple Burlap Place Mats over on Etsy, I'm wondering about making a set of Burlap Birdie Place Mats.  Which design do you like best?

Saturday, 25 October 2014

Stitching on a Rainy Saturday

And the rain rain rain came down down down.  Not in torrents, but persistently as it does here on the coast.  This afternoon Miss S is sleeping, Hubby is performing surgery on the wood stove and I'm curled up with some hand stitching -- at least I will be in a minute, when this post is done and the kettle has boiled for tea.

First, I thought I'd share a few of my many works in progress.


In the sewing room I'm working, slowly but surely, on a new set of table linens for the Dapple shop.  I absolutely love this combination of fabrics.  Grey and pastel.  Mountains and waves.

Miss S sometimes sits on my lap while I do this type of sewing, helping by pulling the pins out when I tell her it's time and meticulously storing them away in the pin cushion.


But in the evenings I've been parked in the living room with my hand work.  These leaves are a bit of scrap bag fun.  I wanted to doodle stitch -- no project in mind.  If you look closely, you'll note that my embroidery skills needed dusting off.   I might chalk this piece up to practice and return it to the scrap bag.  It was fun.


So much fun, in fact, that I've jumped into another little project.  Felt appliques and a little embroidery.  It's quick and simple.  Cozy work.  I have a vague plan of making a enough of these for a bunting-style garland.  

And that is what I'm planning to curl up with right now.  Happy weekend to you.

Wednesday, 23 April 2014

Pattern Review: The "Anywhere Dress" by Go To Patterns

I've been sewing up a storm lately and I'm excited to finally show you some completed projects.  These are two play dress for Miss S.  I really wanted to make her everyday clothes that can handle lots of movement and outside play.  The big pattern companies offer shockingly little in this category.  McCalls seems to think that little girls need closets full of frilly dresses that were in style a generation ago.  Not this little girl.  After much looking, I settled on a pattern from GoToPatterns.  This is my first experience with PDF sewing patterns and let's just say, I had my doubts, so I'd like to offer my thoughts on using this pattern.


But first things first.  Doesn't my Little Miss make a wonderful model?  She's just getting old enough to take instruction from the photographer.  I had her spinning around and reaching up to the sky.  We both laughed a lot.  At least half of the pictures were too blurry to use, but as every mom knows, if you take thirteen million pictures, one or two will turn out.


Pattern Review:  The "Anywhere Dress" by GoToPatterns

*Please Note:  I bought and paid for this pattern and have not been offered anything in exchange for this review.


A Versatile Pattern

I really like the simplicity and versatility of this pattern.  It's perfect for building a little girl's wardrobe.  The four sleeve options are a great start, but don't be boxed in.  I achieved two very different looks out of the same pattern through simple colour blocking and the addition of a coloured band at the bottom hem.  You could make this dress longer (as in maxi dress) or shorter (as in T-shirt).  You could embellish it with top stitching, trims, buttons, pockets or appliques.  You could add a belt or sew ties into the side seams.  You could get really brave and reshape the neckline or skirt.  So many options; one simple pattern.

On that note, I should mention that this pattern is drafted in one piece front and back with no seam at the waistline.  To achieve the colour blocking on the purple dress, I cut the pattern at the "lengthen here" line and added seam allowances to the bodice and skirt pieces.

Preparing the PDF Pattern

Printing and piecing the PDF pattern took some time, but wasn't difficult.  Every page has lettered tabs to match up, so match them and tape it all together.  Done.  This pattern prints in black and white, using different styles of dashed line to differentiate the sizes.  I found this a little hard on the eyes, so I traced the lines for my size in coloured highlighter to make cutting easier.


Sewing with Knit Fabric

If you haven't worked with stretch knit fabrics before, I strongly recommend reading the tips included with this pattern.  They're very helpful.  I used a slight zigzag stitch on one dress (my vintage sewing machine doesn't have the lightning bolt stitch often used for knits) and a double needle on the other.  I've had good results with both techniques in the past and both worked here.

Sewing the Pattern

This is a simple dress and it comes together very quickly -- an evening or two.  The cut pieces fit together as they should -- always a good thing -- and there is no complicated sewing involved.

I would have liked to see some markings on the pattern (I'm talking about the notches and dots that help line pieces up evenly).  They can be easily added by a marginally experienced sewist, but their absence could lead to less than satisfactory results for beginners.

Overall the assembly instructions are clear, the accompanying illustrations are simple and helpful, but that lack of detail shows up again.   There are no indications, for example, to trim bulky seam allowances, clip curves or press seams in specific directions.  These are little things that add up to a very big difference in the overall quality of the finished garment.  Again, anyone with a little apparel sewing experience will know to do these things, but beginners won't.


Fit of the Finished Garment

I made a size 2T for my tall, skinny almost-two-year-old.  As you can see in my pictures, it fits.  There is plenty of space for movement through the shoulder and sleeve areas.  The dress, as cut to pattern, falls at the knee (see the purple dress).  Great.  I did hit one snag, though.  It didn't go over her head.  I discovered this at just the right moment -- after sewing the neckline but before sewing the side seams.  Because the pattern uses a facing, I was able to easily add a keyhole in the back with a button closure (see my pictures).  This may not be an issue in the larger sizes, but if you're sewing for a toddler (they're known for having big heads) I strongly recommend adding the keyhole.


Conclusions

Preparing a PDF pattern takes a little time, but isn't complicated.  The sizing and fit are appropriate, except for the trouble I had getting it over my daughter's head.  Be sure to test this and add a keyhole if necessary.  Experienced sewists will see this simple dress come together quickly and can have fun customizing it.  The lack of pattern markings and overly simplified assembly instructions, however, make it inappropriate for beginners.  This is too bad, as the pattern is advertised to be "perfect for beginners".  

Overall, this is a good little pattern.  It's a simple, versatile dress that will fit into any little girl's wardrobe.  I am sure to make it again and will mostly likely try other patterns from this designer.

Monday, 14 April 2014

Works in Progress

Sometimes I go about my day and write about it after the fact as a means of reflection.  Sometimes, to be completely honest, I add things to my day specifically so I can write about them. Blogging and living is a two-way street.  And every once in a while, life catches me up and I'm so inspired, so driven that I can't take time out to write for fear of missing something while I do. That's where I've been lately.  In the garden.  At the sewing machine.  Taking long dawdling walks in the sunshine with my Little Miss.

Would you like to see a few of my projects?


This will be a sweater for Miss S.  It's by far the most involved crochet that I've done, but it's turning out well.  I'm using this pattern.  I have the back panel completed.


I'm also sewing a couple of play dresses for Miss S.  Frustrated with the selection of toddler patterns from the usual sources, I'm trying a PDF pattern for the first time.  This is the "Anywhere Dress" available from Go To Patterns.  So far so good.


There are some new items in my Etsy shop too.  For summer I thought I'd branch out a little and make a line of casual table linens.


The Sea Breeze collection is already the shop and I'm itching to get to work with this summery fabric combination.  I need a glass of lemonade just looking at it.

Now it's back to work for me, but I'll try to surface a little more frequently.  Do you have anything interesting on the go?

Wednesday, 19 February 2014

Busy, Stormy Days

The electricity faltered and flickered a couple of times today, but stayed on.  It's just as well, because, after days of wind and downpour, I'm less excited about stormy weather and the resulting days indoors.  Don't get me wrong, Miss S and I are west coast girls.  We don't mind getting rained on -- that's what gum boots and Muddy Buddies are for -- but this wind is something else.  We're starting to feel a little house bound.


How do we make the most of indoor days?  With projects, of course.  This is a little sneak peak at something I'm working on for my Etsy shop.


And this is a tunic dress that I started for Miss S.  I'm only just now getting my gumption up to sew for her.  Part of the trouble is that a pattern costs as much or more than an off the rack outfit, never mind fabric and notions.  But I want to sew for her, so I'm making extensive changes to an old dress pattern borrowed from my mother-in-law and hoping to end up with something Miss S and I will both be happy with.  Fingers crossed.  This is new territory for me.


Here's a little sunshine on a stormy day.  Miss S's project involved playdough and cookie cutters.

What do you do on indoor days?  Looking at the weather forecast, I'm pretty sure I'll need some more ideas.

Thursday, 23 January 2014

A Moment in the Life

Dazzled by all the beautiful online glimpses of other people's lives, I set myself a little challenge this afternoon.  While the Little Miss napped, I crept through the house to search out my own bits of macro beauty.  The rules:  no cleaning up before taking the shot, no arranging or turning to catch the light.  In short, no touching.  Just document the moment.  Take a freeze frame of life to see if there is anything lovely -- anything thought-provoking or meaningful or blog-worthy -- in this very ordinary moment of my life.

Would you like to see what I found?


Tea, anyone?  My Little Miss loves setting her tea table on the ottoman.  She stirs and pours and narrates.  Soup.  Tea.  More more.  Salsa.  There's always something new on the menu.


Just a few feet away, my crochet project sits on the couch.  Last night yarn hook came to hand and I didn't know quite what I wanted to make until it was done.  What should I do with it?


Don't trip on the train!


Piled atop the sewing machine, another project.  This one was started with more intention (but I won't tell you how long ago) and is almost done.  It's a shirt for me.


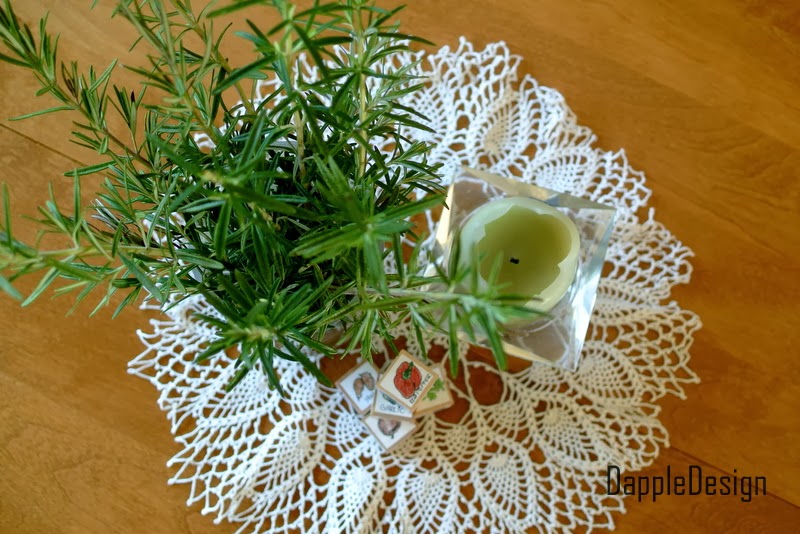
Sitting pretty on the dining room table, a bunch of rosemary.  A little green from the garden goes a long way on a rainy winter day.

And that, friends, is a what I found in this ordinary moment.  

I'm still trying to settle on my reasons for blogging and what I want to write about.  It's a process, a growth curve.  I think this little challenge has helped.  Blogging is quickly becoming, for me, a way to freeze an ordinary moment and examine it for meaning or beauty or even ambiguity.  It plays toward the examined life.  And the shared life, because I'm starting to make friends and look in on their moments.  

What's laying around your house right now?

Monday, 9 December 2013

Give Away Day

This Give Away is now Closed.  

The winner, selected by random number generator, is lucky comment #21.
Congratulations Tammy.  You'll be getting an email soon.

Thank you to all who entered, and to Sew Mama Sew for hosting Give Away Day.

It's about time I gave something away.  I'm looking beyond Christmas with this selection.  And why not, once the holidays pass we all need something bright and cheerful to carry us through the remaining darkness and into spring.  I think these pretty pink and green prints will do the trick.

Would you like to be the lucky winner of these eco-friendly cloth gift bags?  You'll get:
- a Medium sized cloth gift bag in pink and green with pink ribbon tie,
- a Wine bottle cloth gift bag in green stripe print with pink ribbon tie and
- a set of three book-page gift tags.

All lovingly crafted by yours truly.


To enter this give away, please visit the Dapple Design Shop on Etsy and look around.  Then come back here and leave a comment telling me what you liked best.  It's that easy.

Contest closes Friday, December 13 at noon, Pacific Standard Time.
Open to readers in Canada and the United States.
Winner will be selected randomly and notified early next week.

Please Like my Facebook page as well.  It won't help you in the give away, but you'll be more likely to hear about future contests and events.

Good luck!


Linking to Give Away Day at Sew Mama Sew.

Friday, 27 September 2013

My New Venture

At the end of my last post I briefly mentioned that my new Dapple Design Shop is up and running on Etsy.  I'm actually pretty excited about this new venture.  Ideas fill my head.  Too many to execute, so I'm starting off simple with a product that I think everyone can appreciate:  gift bags.

I've been dabbling in alternative gift wrap for a while, mostly because I can't stomach the wastefulness of single-use, disposable wrapping paper and ribbons.  For years we wrapped gifts in nothing but the plain white paper scrap that the wide-format printer at my husband's office spit out.  That may sound dull, but it wasn't.  The bright white paper presented an ideal backdrop for stamping, painting, collaging or simply tying ribbons.  Sadly, a new printer at the office has dried up the flow of paper scrap, leaving me in need of a new, non-wasteful way to wrap presents.


My husband's birthday was earlier this week and these three presents were for him.  Don't they look nice?  The wrappings belong to my new line of fabric gift bags that can be used again and again.  Unlike paper gift bags -- which some people hang onto, while others chuck -- these cloth bags look and feel like part of the gift, not just the disposable packaging.  That makes them far more likely to be re-used.

These images are from the Dapple Design Shop.  I've only  just begun, but I'm working to add a deep variety of fabrics -- something for everyone.  If you haven't already, please drop in for a visit. 

Posted by Picasa

Thursday, 18 July 2013

Animal Key Ring Toddler Toy, a Tutorial


Do you know a little person who will want to handle this mini menagerie?  I'm pretty sure that Miss S, at one year old, will appreciate the varied shapes and colours.  She hasn't actually seen them yet, and she won't for another week as I'm busy laying in a stash of car seat-friendly entertainment for a road trip.  I'll let you know how they go over.

This toy is appropriate for very young babies (make it into a mobile or hang the animals from an activity bar) as well as for older toddlers who could name the animals and engage them in imaginative play.

What You'll Need
  • a fabric panel or print with animals that can be cut out individually*
  • heavy-weight fusible interfacing
  • quilt batting
  • matching ribbon
  • large binder ring (the type that opens on a hinge; look in an office supply store)
*Choosing suitable fabric is important.  Look for quilt panels or applique panels where the animals are meant to be cut out.  You could also use a fabric with a large print (like this or this).  And don't limit yourself to animals; make a ring of pretty flowers or fruit or geometric designs.  Finally, I used a printed cotton panel that included reverse images of each animal.  This allowed me to make double-sided animals, but might be difficult to find.  Consider using an animal on one side and coordinating fabric on the back.


Ready.  Set.  Go.
Roughly cut out two reverse printed animals (or an animal and a backing), leaving lots of extra fabric around the edges.  Apply heavy-weight fusible interfacing to the back of each.


Sandwich a piece of quilt batting between the animals.  Right sides should face OUT.


If you're using reverse printed images, make sure they are lined up perfectly on top of each other.  This is a little fiddly, but worth the effort.  If you're using a coordinating fabric backing, your job will be much easier.  secure the three layers together with pins, then hand baste with contrasting thread, taking care not to baste too close to the edges.

Cut 2 inches of ribbon and fold it in half to make a loop.  Place the loop wherever you want the finished animal to hang from (see next picture) and insert the cut edges of ribbon into the middle of the sandwich (NOT on top as shown in the picture).  Secure with a pin.
 
Use a sewing machine to zigzag, through all layers, around the animal shape.  If your machine allows for it, lighten the pressure on the presser foot to make it easier to maneuver the fabric. It's ok to stitch over the animal itself a bit.  It's ok to lift the presser foot when the needle is down and rotate the fabric to get around a tight corner.  

I took care to keep my stitching well inside the darker blue area of my cutout so that no lighter blue would show in the final product. Depending on your fabric, this may not be an issue for you.  


Remove the basting thread.

Cut out the animal shape, leaving only a narrow margin around the stitching but being careful not to cut it.  When you get to the ribbon tab, cut the top and bottom layers separately (see picture) to avoid cutting off the loop.


Ta Da!  Make as many animals as you like, then use the loops to attach them all to the binder ring.  Your little person can play with them all together like a set of keys, or you can separate them for different games.  Either way will be loads of fun, so get sewing, and be sure to let me know how it turns out for you.
 
Posted by Picasa